
Note: Albatross uses an AWS Private Link VPC endpoint to connect to Snowflake. This requires a Snowflake Business Critical account.
This page is for example purposes, and there will always be some nuance to each environment. Please contact us for free implementation help to get the most out of our 31 day trial!
1. View Albatross on AWS
First, click here to view the Albatross listing on AWS Marketplace.
Click "Try for free", and continue through the prompts.
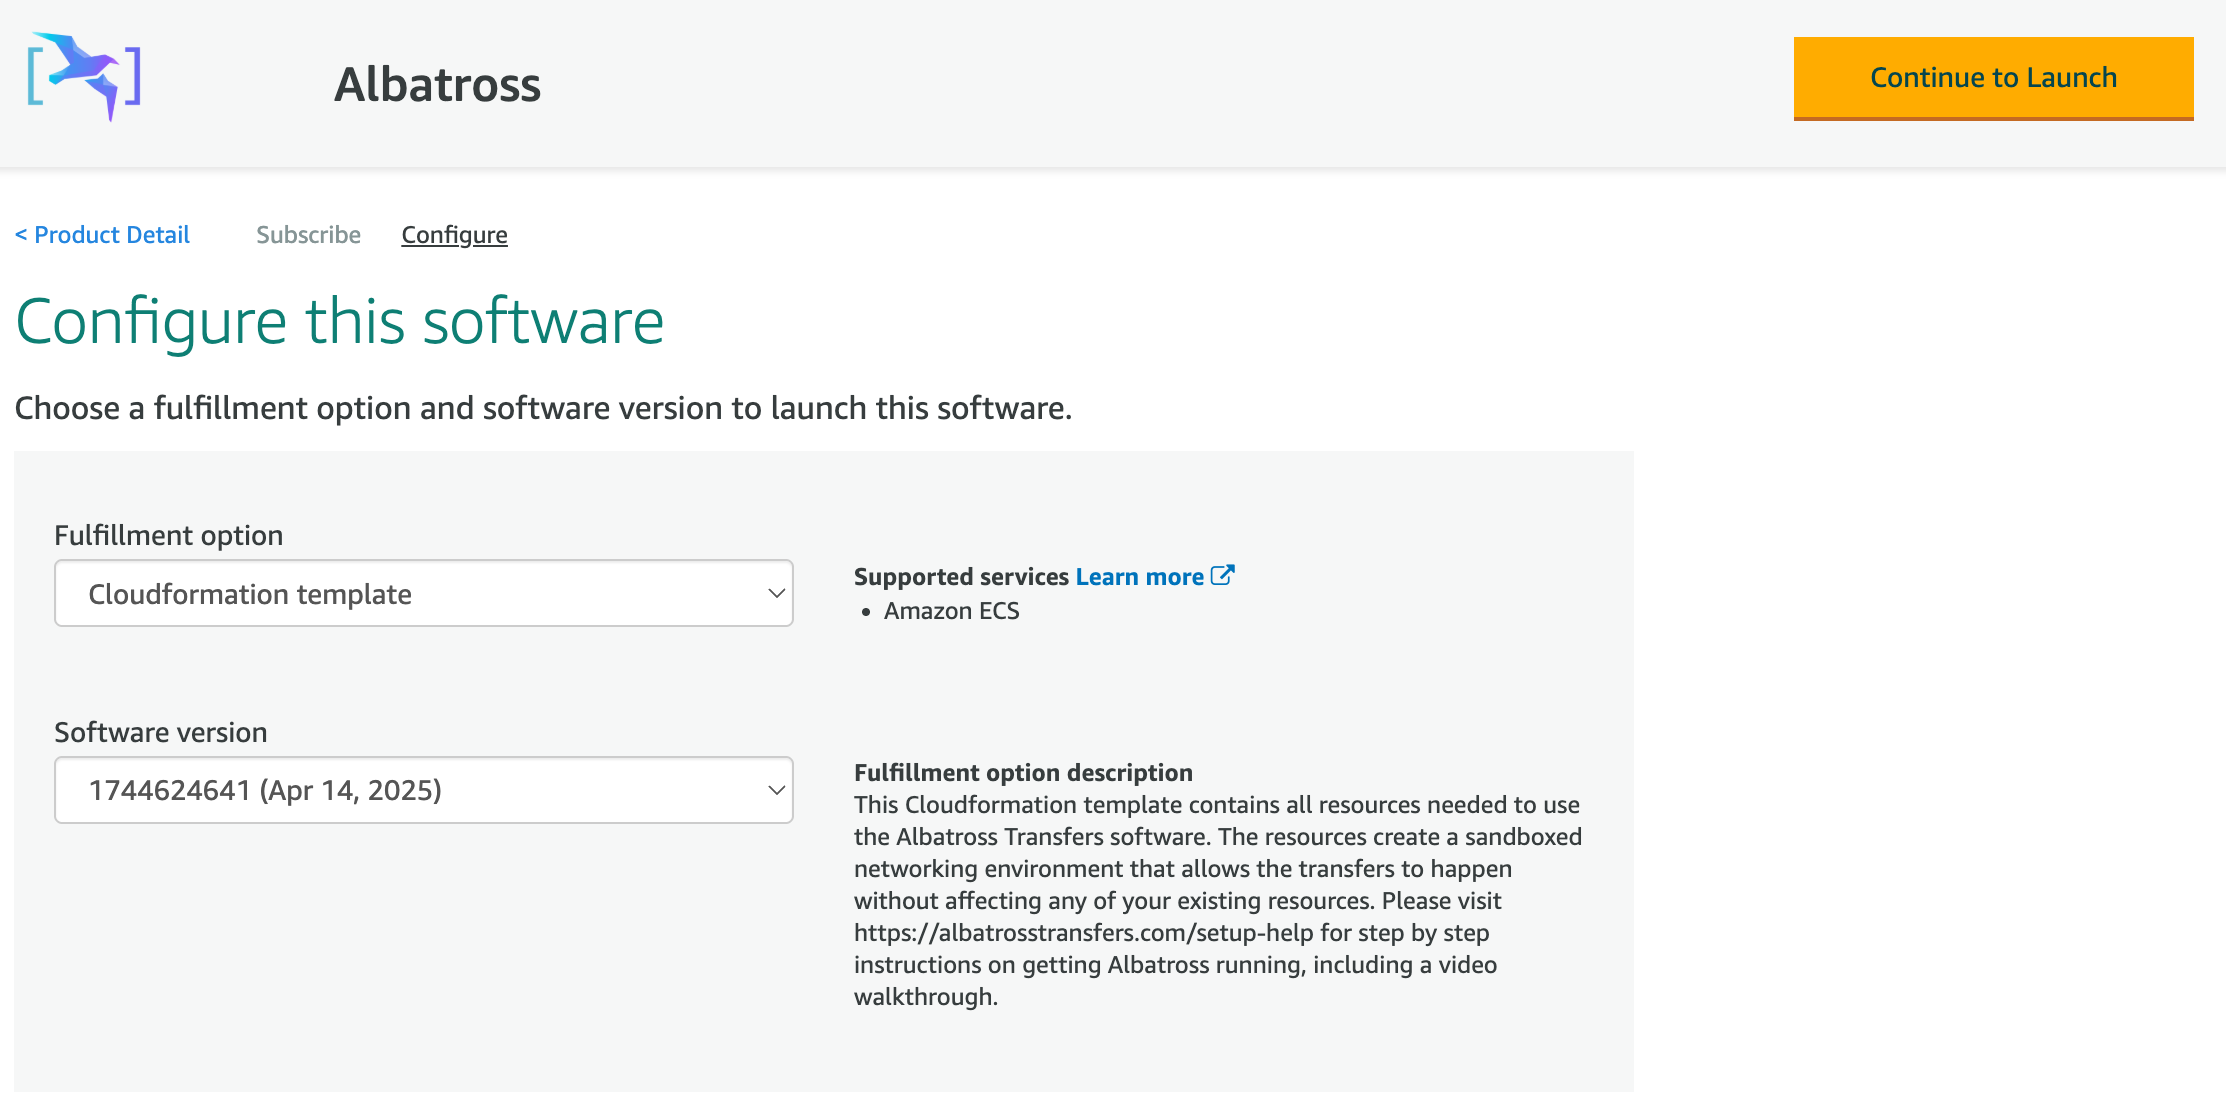
When you get to the page titled "Configure this software" be sure to select the latest software version, and the "Cloudformation template" fulfillment option, when they are presented to you. They should already be selected by default.
The page looks like this:
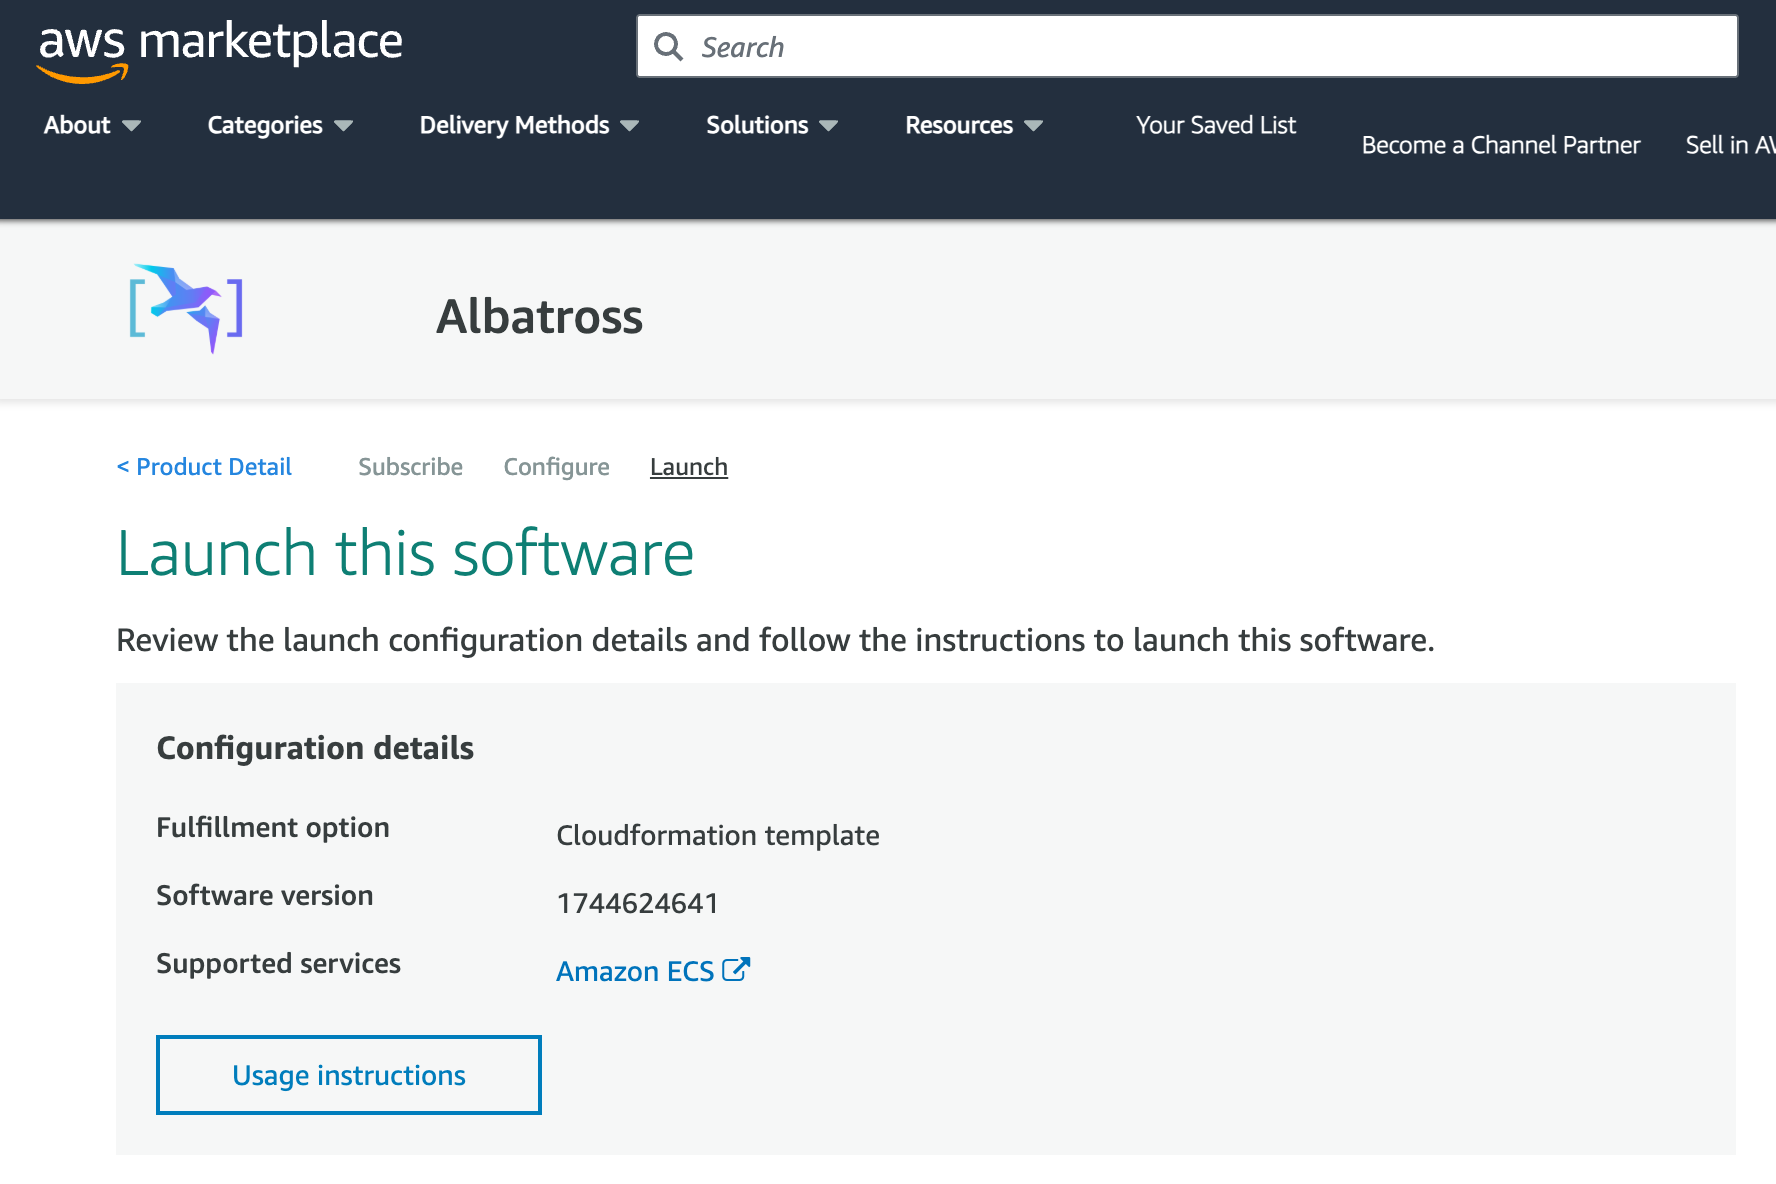
Eventually, you will reach a screen titled "Launch this software." At this point, you have gained access to the software. Don't worry about anything else on this page - you can close it. Just continue on to the next part of this document.
2. Create stack
Next, log in to the AWS console and navigate to the Cloudformation dashboard.
If you don't have any Cloudformation stacks, the dashboard will look like this. Click "Create stack."

If you have prexisting Cloudformation stacks, the dashboard will look like this. Click "Create stack", then select "With new resources (standard)."

Next, select "Choose an existing template" and "Amazon S3 URL". Input the following URL: https://albatross-templates.s3.us-east-1.amazonaws.com/albatross-cloud-formation-release.yaml
Before running the template, we advise you to download the file at that URL and inspect it to ensure you OK deploying those resources into your cloud environment. It is well-commented and self explanatory.
3. Specify Stack Details
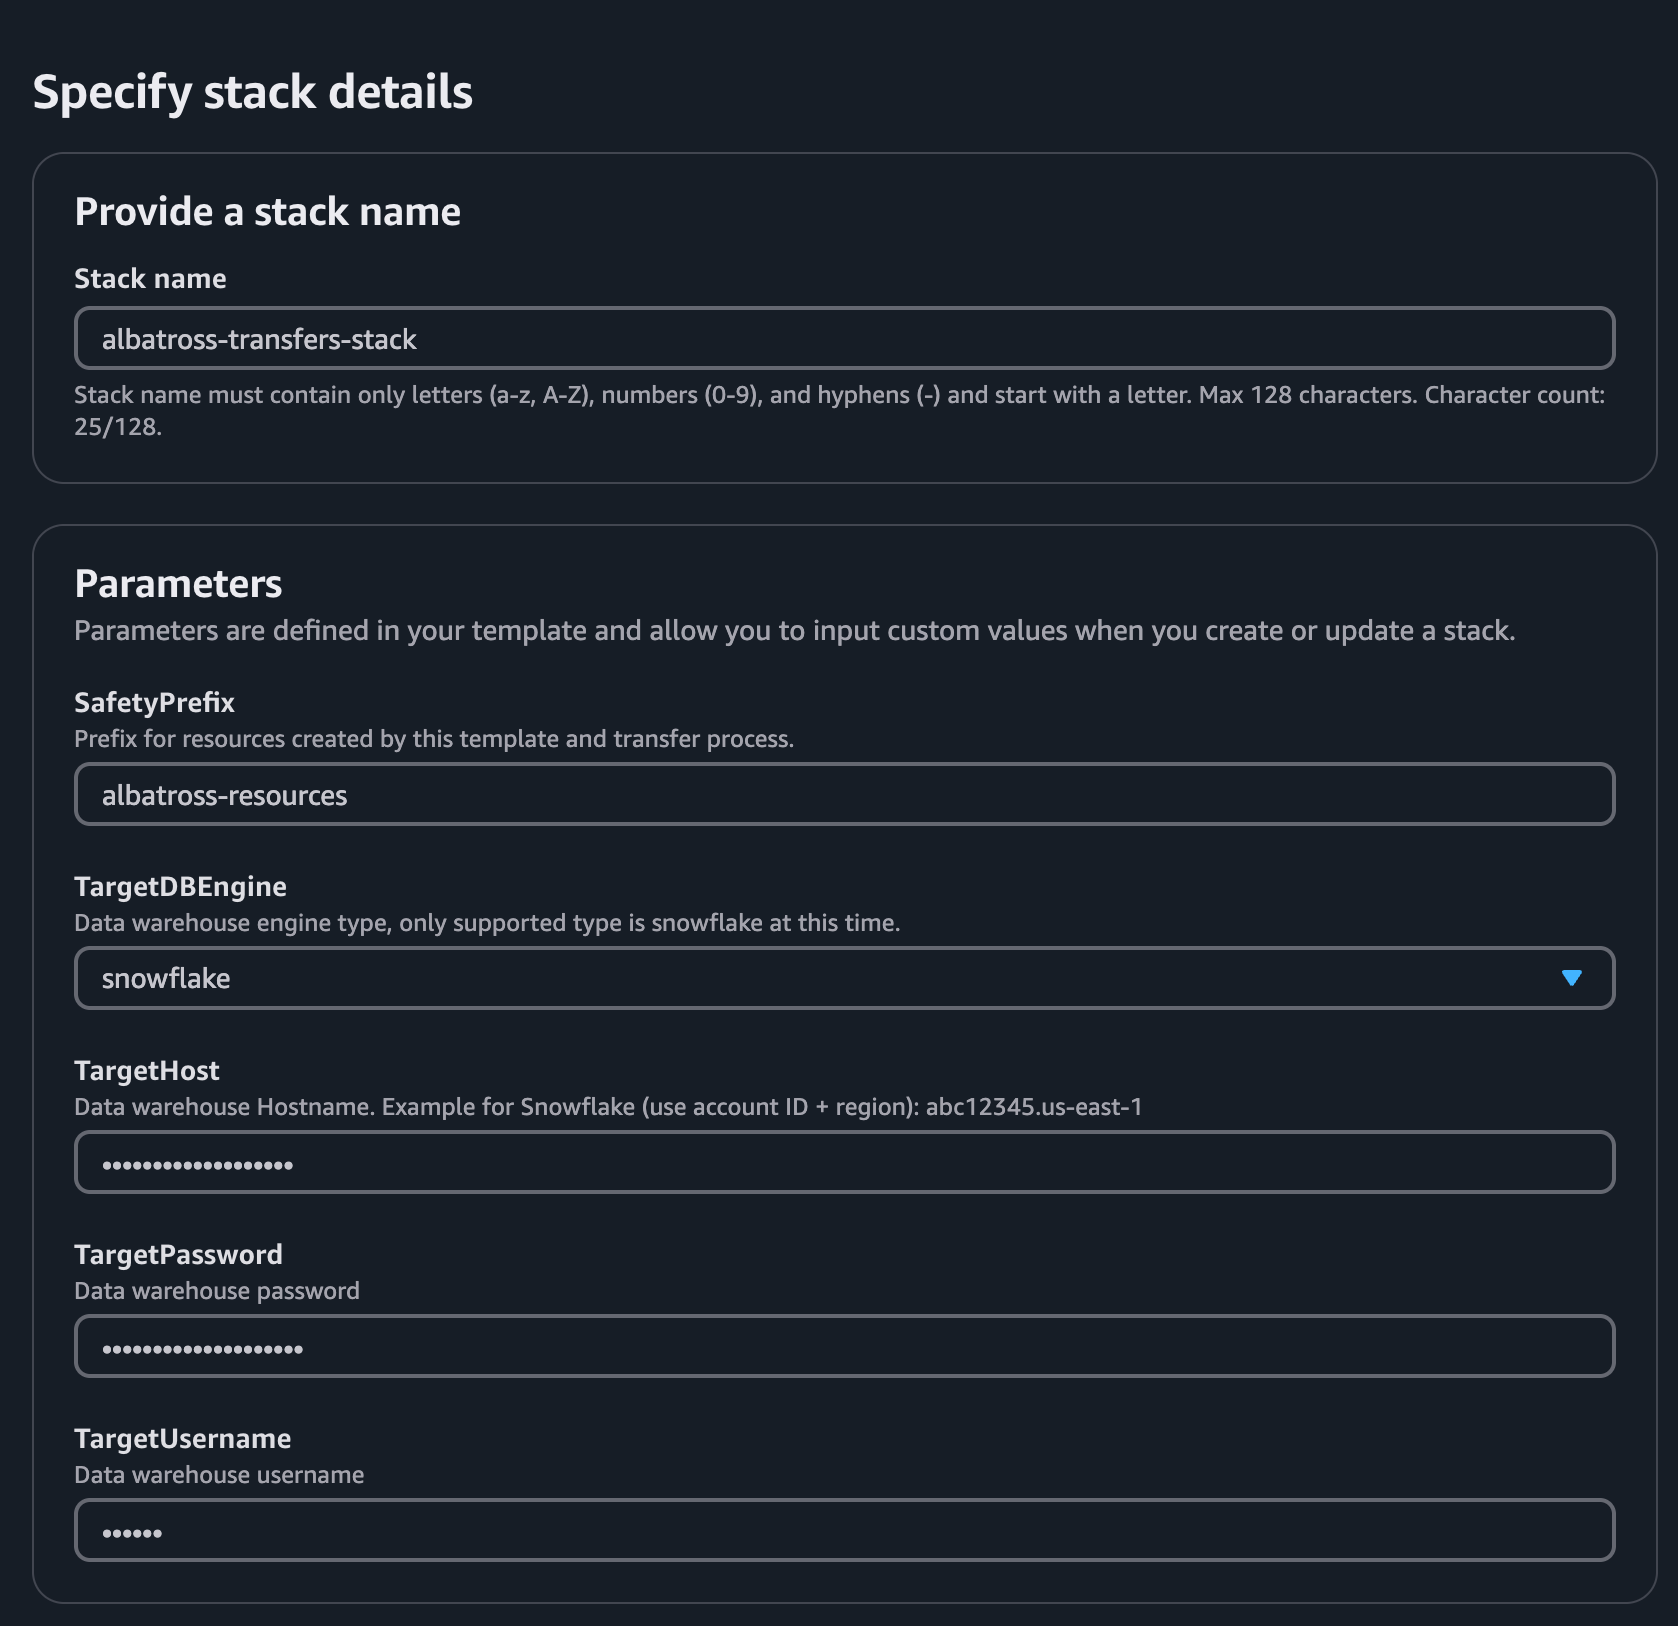
Stack name is simply a name for the resources stack you're about to create. We recommend "albatross-transfers-stack", but this can be any descriptive name you want.
SafetyPrefix is a prefix will be used when creating all cloud resources to avoid naming collisions. You can leave it at the default of "albatross-resources", or change it to something else. Just make sure to avoid using any other prefixes you commonly use in your cloud env.
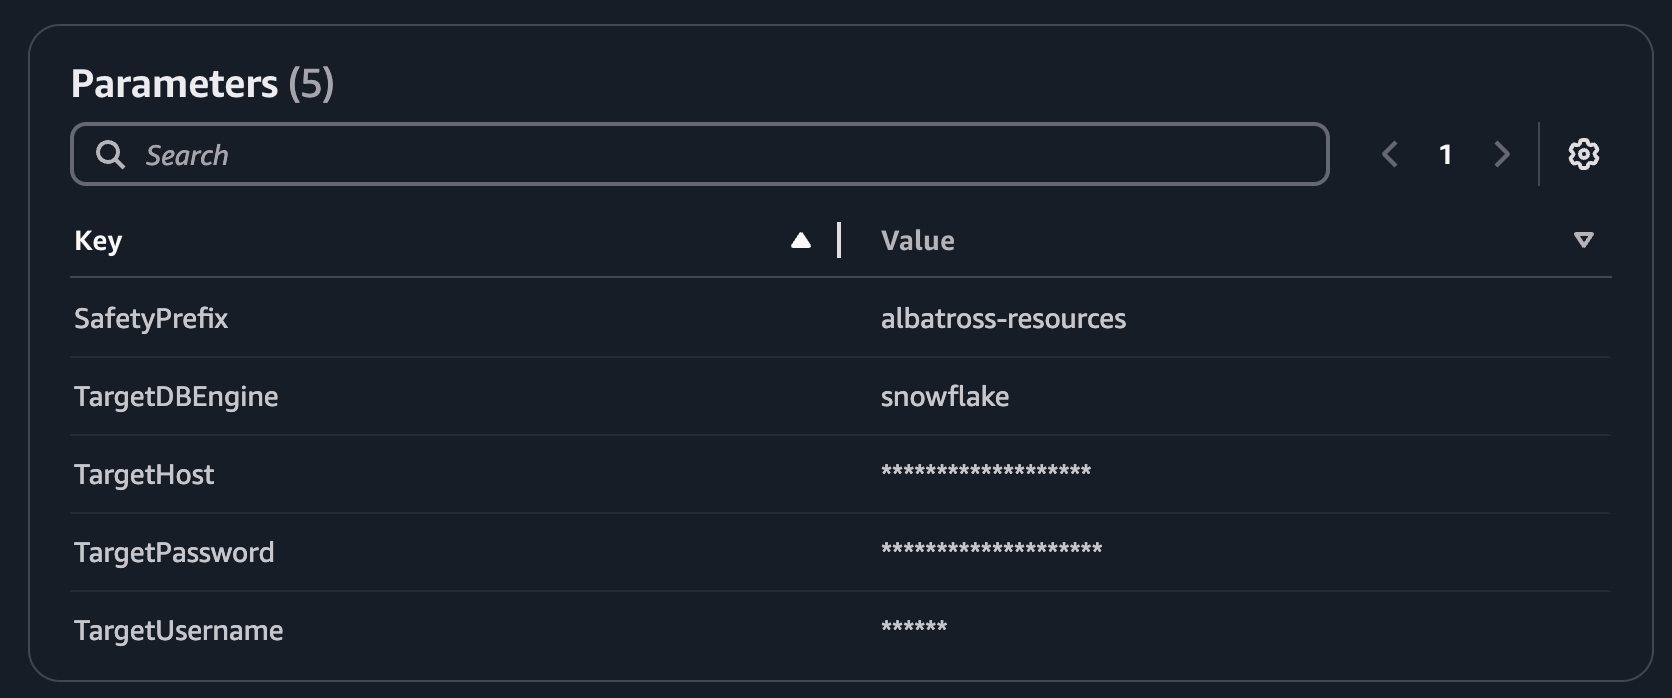
4. Snowflake values
All of the following values will be stored in your AWS Secrets manager. None of this information will be shared with Albatross, or any external entity.
TargetDBEngine must be Snowflake at this time. More data warehouses will be supported soon.
TargetHost is your Snowflake account ID. You can get this by looking at the URL in your Snowflake login screen. For example, "abc12345.us-east-1".
TargetUsername is the Snowflake Username you want to use when inserting data into Snowflake.
TargetPassword is the password that authenticates the aforementioned username.
5. Configure Stack Options
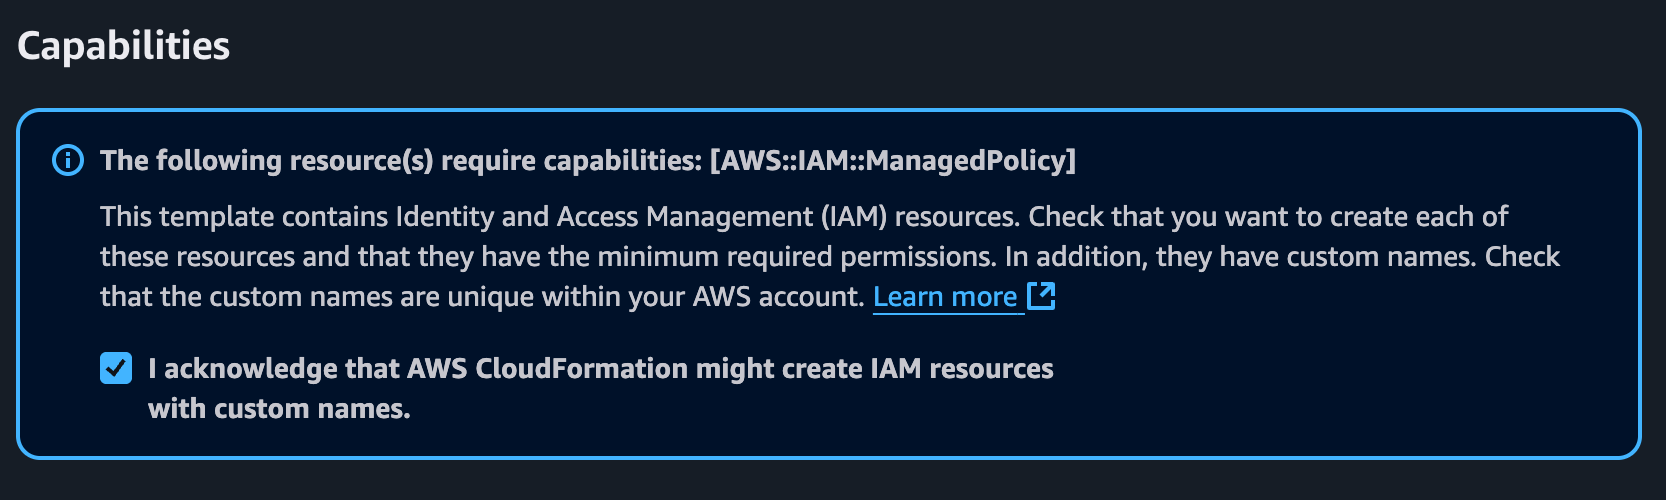
Check "I acknowledge that AWS CloudFormation might create IAM resources with custom names" at the bottom of the page. You can leave everything else as-is.
6. Review and Create
Review that your stack parameters look right and click "Submit" at the bottom of the page.
The Cloudformation template will now deploy. It will take around 10 minutes to create all of the needed resources.
7. Creation Process
During the creation process, you can see the resources that are being created. This process will take around 10 minutes.

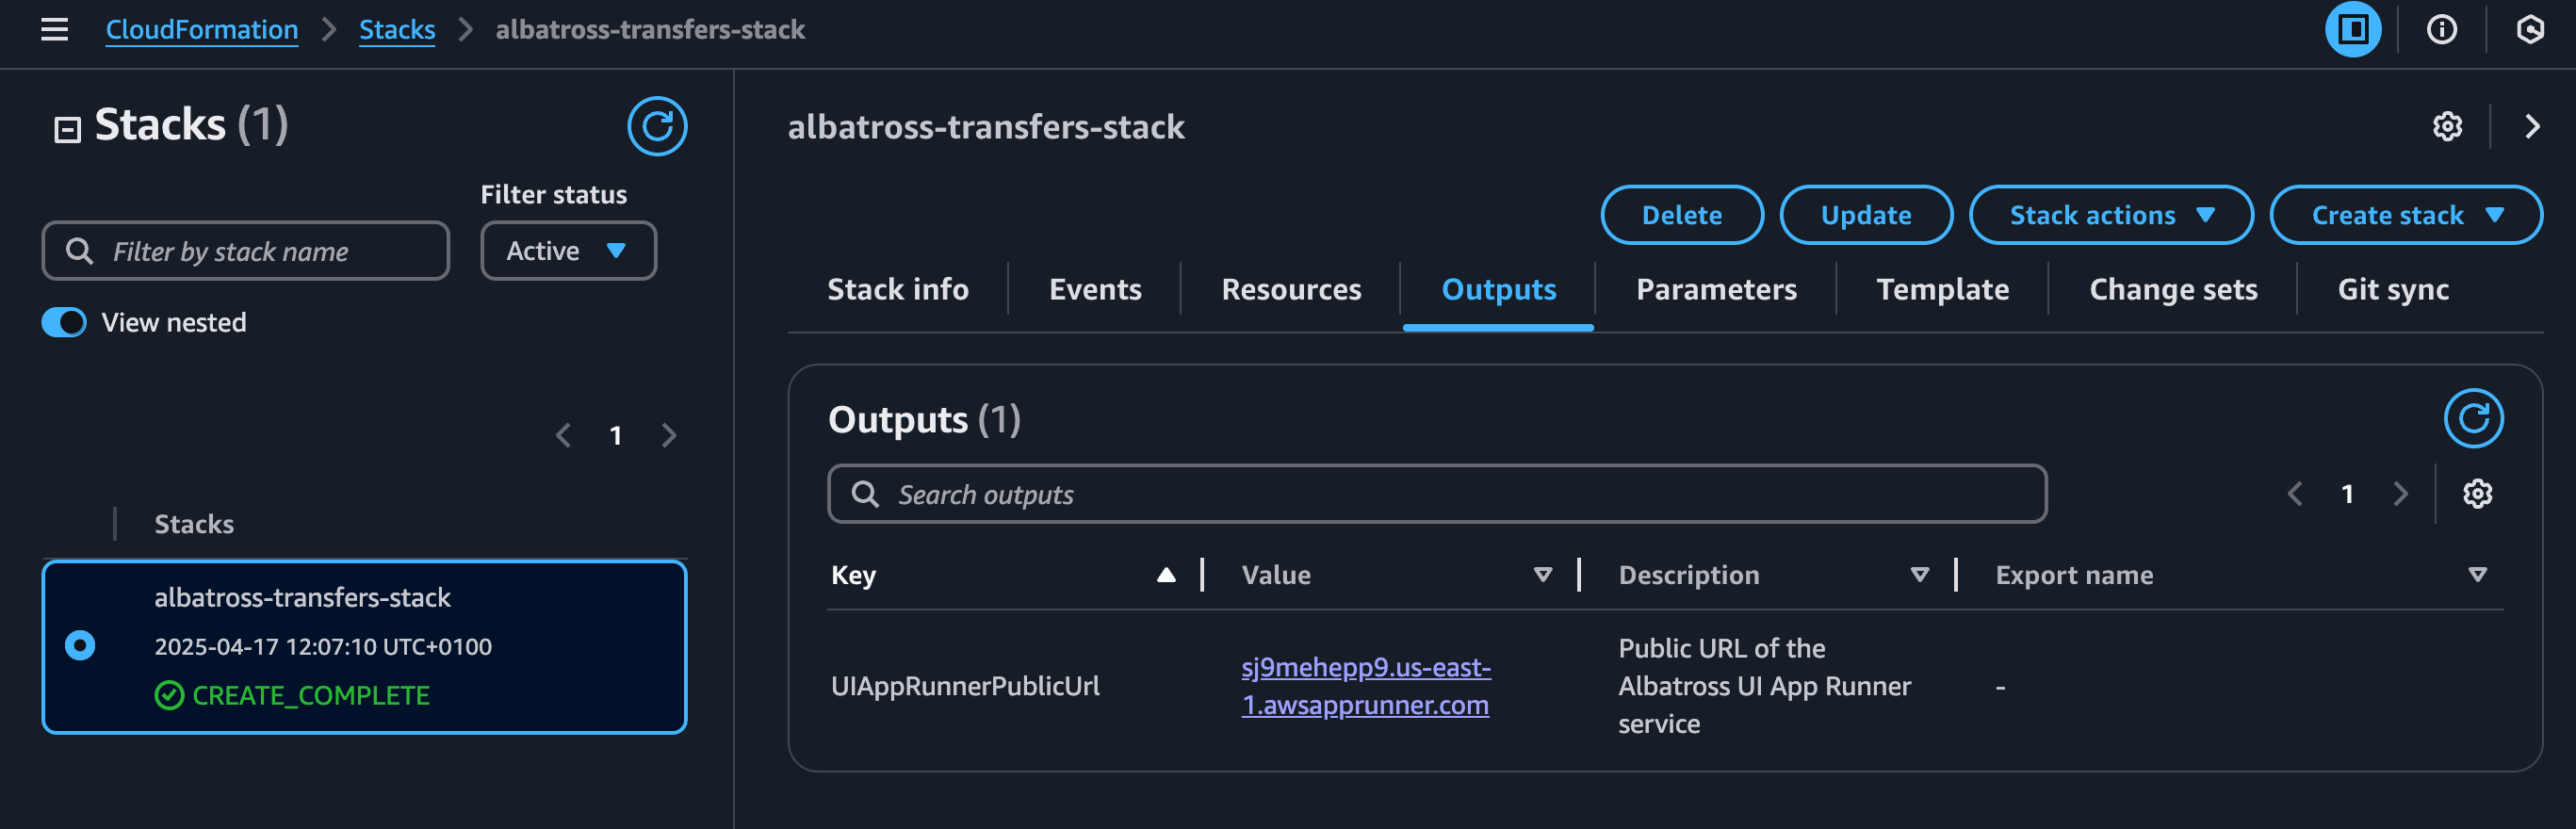
8. Open Web UI
Once the stack has finished deploying, go to the "Outputs" tab and click the link output under the "UIAppRunnerPublicUrl" key. This will open Albatross' web UI.
This web UI is being served by AWS App Runner in your account, and has automatic TLS encryption. It is safe to interact with this UI - no outside party (including Albatross) has influence here.
This will bring up the login screen.

You will need to create a user to access the program's functionality. Click "Create new user", and read the instructions on that page.
There are no public signups for this web UI. All access is controlled via Lambda functions.
The easiest way to create a user is editing/pasting the CLI command on this page into the AWS cloud shell.
Copy the CLI command into a text editor:
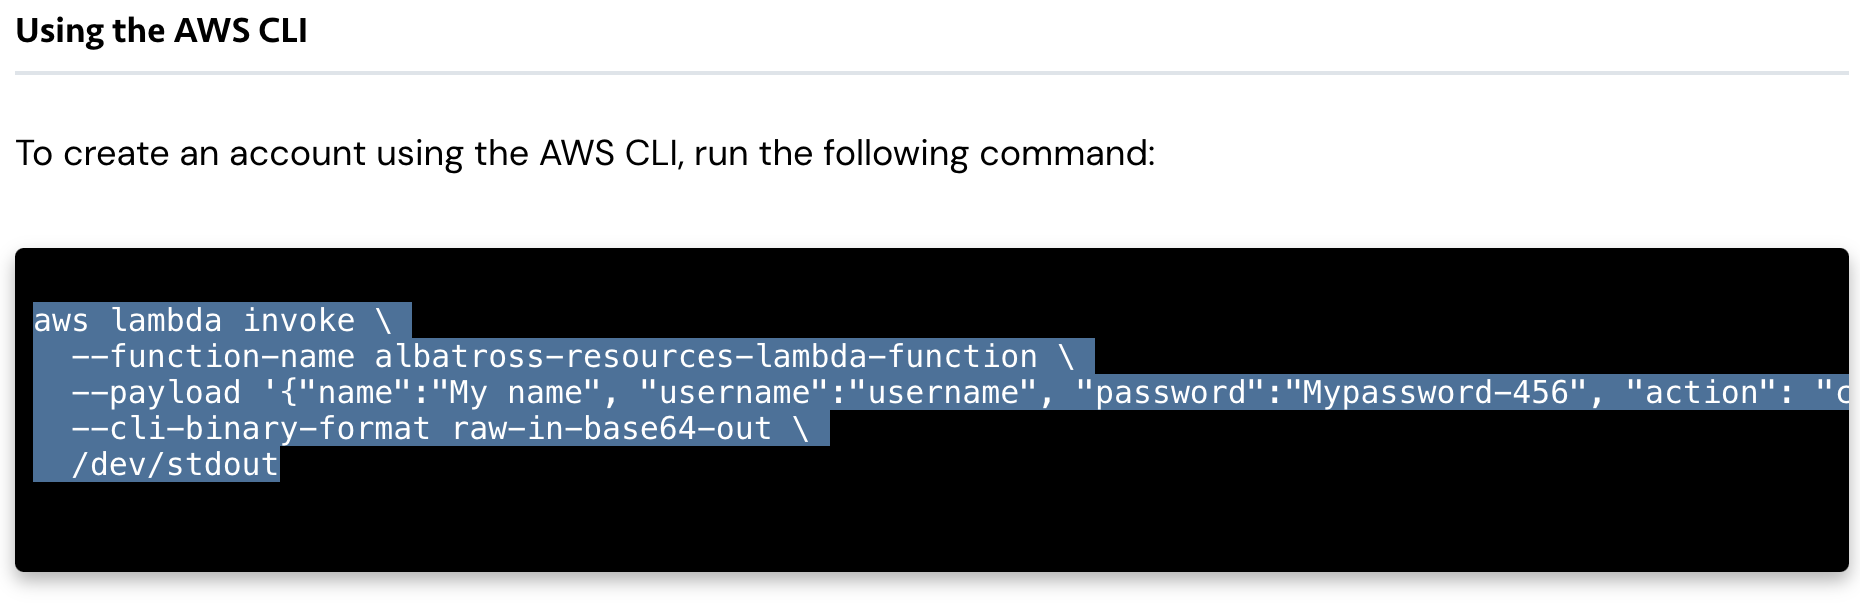
In the text editor, set the name, usename, and password of the user you want to create.
FYI, your password must contain at least 12 characters, and an uppercase letter, lowercase letter, and a number.

Now, if you already have the AWS CLI on your computer, and are authenticated to the correct account/region, you can enter that CLI command into your command line.
However, it is usually easier to use the AWS Cloud Shell in a web browser.
In the AWS console, click the "Cloud Shell" button on the top of the screen.****

Then run the command in the cloud shell. You may get a warning that you're about to paste a multi-line command. Click through the warning, and run it.
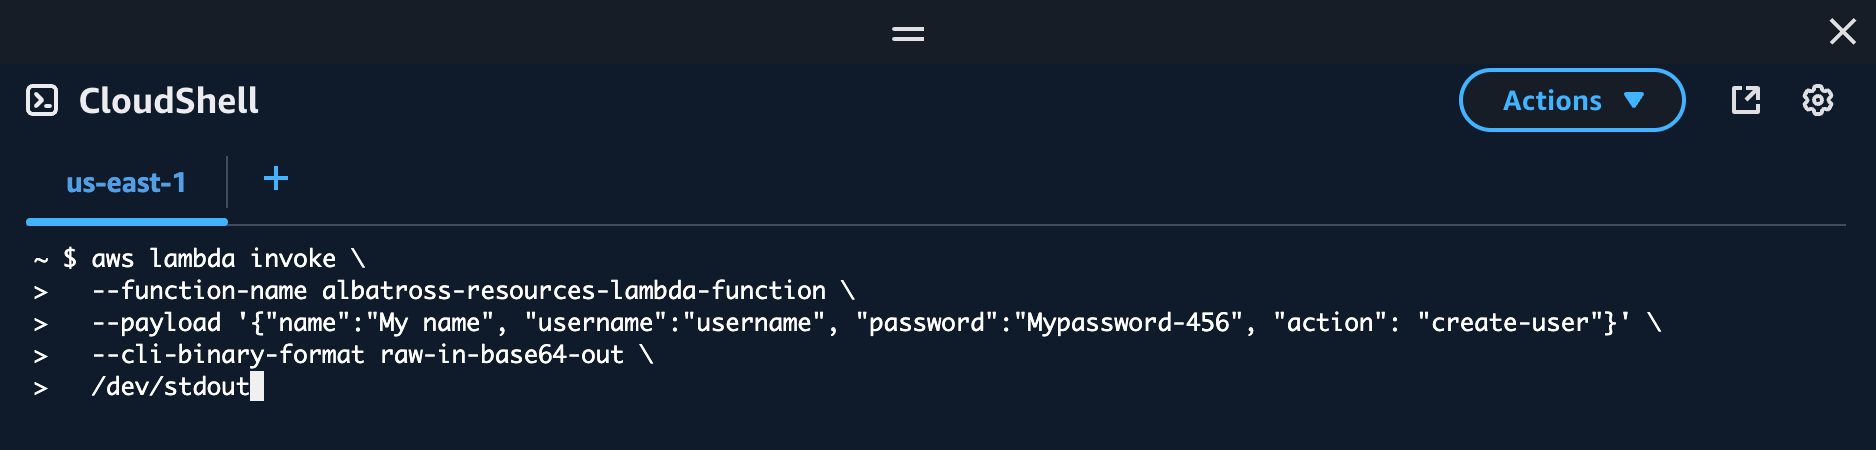
You will get a success code after a few seconds:

Click "Back to login", use the credentials you just created to login, and start moving databases!

9. Creating or Scheduling Transfers
To start one or more transfers immediately, go the "Instances" tab, check the boxes next to the instances you want moved, and click the respective button.
Note: Albatross pulls data from the latest backup of each database. Therefore, you will get an error if you try to move a database that doesn't have a backup.
To view recent transfers, or schedules, visit the "Instance Transfers" or "Schedules" tab.
10. Delete Users
To delete a user, you must also use a Lambda function, like so:
aws lambda invoke \
  --function-name albatross-resources-lambda-function \
  --payload '{"username":"cal-mitchell", "action": "delete-user"}' \
  --cli-binary-format raw-in-base64-out \
  /dev/stdout